Updated Date: 07/07/2026
Setting up client side directory
In Windows 10, an Azure AD user account is called a Work or school account. To join to or register on Azure AD requires Windows 10 PRO, Education or Enterprise edition. To connect to Azure active directory:
-
Open Windows Settings, click Accounts > Access work or school.
-
For applied Condition Access settings, click Connect to Azure Active Directory. Enter the email address and password of Azure AD account.
-
For connect to MDM Intune, click Connect. Enter the email address and password of Azure AD account.
-
-
Login to the Azure Active Directory account on the client machine.
-
Install F5 Access from the Microsoft store. Ensure that the F5 VPN server address is trusted for the client.
To view the admin log:
-
Open Event Viewer.
-
Expand Applications and Services Log.
-
Click Microsoft > Windows > Vpn Plugin Platform > OperationalVerbose.
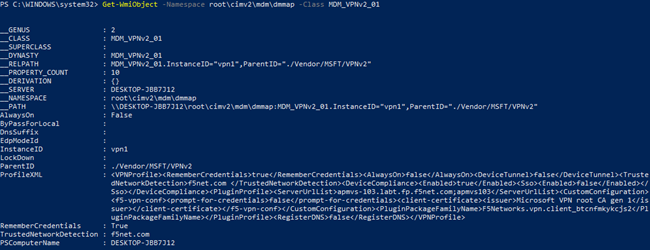
To verify existing configuration applied to F5 Access, run the following command in PowerShell:
Get-WmiObject -Namespace root\cimv2\mdm\dmmap -Class MDM_VPNv2_01