Updated Date: 07/07/2026
Advanced Customization Coding
With advanced customization, it is possible to change almost anything with a certain knowledge of HTML, CSS, and JavaScript. UI templates, which consist of HTML and PHP files, and CSS files, are available for edit directly from the Advanced Customization view.
Customization variables are special symbols, such as %[variable_name], in a UI template. A customization variable is a placeholder for actual customization and localization values. When a UI page is generated from a UI template, customization variables are replaced with actual values.
Important: Customization uses the same UI templates for all languages. Therefore, F5 recommends that when you customize UI templates, you reuse customization variables for localized texts. Otherwise, you risk creating localization conflicts.
Customization uses PHP code inside UI templates.
Important: F5 recommends that when you customize UI templates, you do not delete or modify PHP code.
In the hierarchy of the advanced customization user interface, all CSS code is located under Access Profile > Common. The folder contains various versions of the Access Policy Manager (APM) CSS code with names such as apm_mobile.css and apm_full.css. When displaying generated UI pages, APM picks the correct .css file for the client (mobile browser, full browser, BIG-IP Edge Client).
If you create a UI template that partially or completely replaces the default structure provided by F5, F5 recommends that you do not change existing CSS definitions but add your own with different names (IDs). Otherwise, you run the risk that other non-customized pages will be misrendered.
To replace a main table with your div, on the logon page for example, replace <table id="main_table" class="logon_page"> with your <table id="cust-main" class="cust-logn-page">.
With advanced customization, you can partially or completely replace the default structure for pages. To avoid unexpected problems however, follow these recommendations when editing .css and .inc files.
- .css file
- Do not change existing CSS definitions but add your own with different names (IDs). Otherwise, you run the risk that other non-customized pages will be misrendered.
- In your new code, reuse existing customization variables (%[variable_name]) rather than creating new ones; doing so prevents localization conflicts.
- Do not change PHP code.
- .inc file
- In most cases, you can safely replace the code in .inc files.
The first line of the code for the existing logon page table is: <table id="main_table" class="logon_page">. Retain that code and add code for a div or a table that you want to use instead. For example, the code for a new table might start like this: <table id="cust-main" class="cust-logn-page">.
You can customize the following files for access profiles in the Advanced Customization view.
|
Name |
Description |
|---|---|
|
apm_full.css |
File that contains all CSS for desktop browsers; also contains this PHP: -
|
|
apm_mobile.css |
File that contains all CSS for mobile browsers. If you want mobile pages to look exactly the same as full browser pages, you can replace the contents of apm_mobile.css contents with the contents of apm_full.css. |
|
footer.inc |
The include file that specifies the footer text line. |
|
apm_edge.css |
File contains all CSS for BIG-IP Edge Client pages. Important: F5 recommends that you do not edit this file. |
|
javascript_disabled.inc |
File that is included with every page and displayed only when the browser does not support JavaScript. |
|
header.inc |
File that specifies the page header content for access profile pages on all devices. The file includes this PHP: -
The file includes JavaScript: |
|
apm_mobile_ppc.css |
Styles for old Windows mobile device. |
You can customize the following files for access profiles in the Advanced Customization view.
| Name | Description |
|---|---|
| my.acl.inc | ACL denied page if user tries to access prohibited URL. |
| urlfilter_blocked.inc | Secure Web Gateway (SWG) access denied page if user tries to access prohibited URL. |
| access_notfound.inc | The HTML, JavaScript, and PHP code that presents a page when access is not granted. |
| logout.inc | Default logout page. |
You can customize the following files for access profiles in the Advanced Customization view.
| Name | Description |
|---|---|
| logon.inc | Customization of logon page. |
| http_401.inc | Customization of HTTP 401 error (unauthorized) page. |
| view.inc | Customization of VMware View logon page. |
You can customize the following files for access profiles in the Advanced Customization view.
| Name | Description |
|---|---|
| decision_box.inc | Specifies the layout for the HTML that appears in a decision box. |
You can customize the following files for access profiles in the Advanced Customization view.
| Name | Description |
|---|---|
| message_box.inc | Specifies the layout for the HTML that appears in a message box. |
You can customize the following files for access profiles in the Advanced Customization view.
| Name | Description |
|---|---|
| my.acl.inc | ACL denied page if user tries to access prohibited URL. |
| urlfilter_blocked.inc | Secure Web Gateway (SWG) access denied page if user tries to access prohibited URL. |
| access_notfound.inc | The HTML, JavaScript, and PHP code that presents a page when access is not granted. |
| logout.inc | Default logout page. |
You can customize the following files for webtops in the Advanced Customization view.
| Name | Description |
|---|---|
| hometab.inc | Not applicable; file pop up. |
| webtop_popup.css | Pop up file CSS. |
| webtop_help.inc | Help file for webtop. |
| desktopClass.js.inc | Main JavaScript file for webtop. |
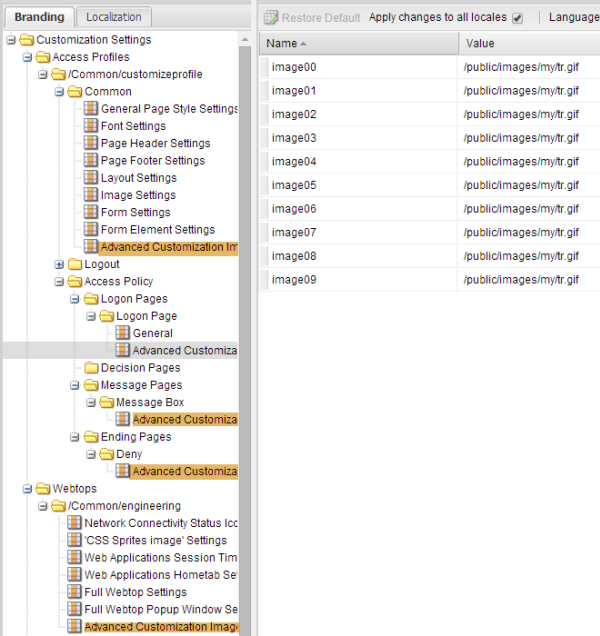
In the General Customization view, each access profile, access profile page, and webtop includes an Advanced Customization Images setting. The setting provides storage for up to ten images that are then available for use in the Advanced Customization view. An image specified in the setting is managed with the parent object; it is exported, imported, copied, or deleted along with the parent object. It persists with the parent object through backup and upgrade procedures. An image is specified as a name-value pair.
- Name
- Images names (image00 through image09) are fixed; they are only placeholders. An image name, for example image00, does not correspond to a location on a page or to an image that is already used in the UI. The numerals, 00, do not indicate order or precedence. The image name can used as a variable in the code for a parent object in the Advanced Customization view. This code specifies image00 as a variable:
<img src="%[*image00*]"/>. - Value
- Image values provide file paths and the file names for image files. To use the image, the value can be copied from the setting in the General Customization view into the code in the Advanced Customization view. A default value
/public/images/my/tr.gifindicates that a customized image has not been specified.
You can think of the Advanced Customization Images settings as libraries of images. Each library has a scope: the object that manages the library can always use images from it; sometimes child objects can also use images from the library of a parent object. Advanced Customization Images settings offer a lot of flexibility. When deciding where to store images, consider how much flexibility you need and whether using images from a parent object library provides adequate control.
- Access Profile Advanced Customization Images
- If you store images in the Advanced Customization Images setting for an access profile, you can use the images not only in the access profile code but also in the code for access policy pages. The advantage of this approach is that if you need to update images, you only need to change them in one setting. However, if you want to ensure that images on an access policy page remain the same regardless of changes to images in the access profile Advanced Customization Images setting, this might not be the approach you want to use.
- Access Policy pages Advanced Customization Images
- If you store images in the Advanced Customization Images setting for an access policy page, you can use the images in the code for that page only. You can store the same images that are stored at the access profile level, different images, a mix of both, or no images.
- Webtop Advanced Customization Images
- If you store images in the Advanced Customization Images for a webtop, you can use the images in the code for that webtop only. However, general customization provides many settings in which to specify icons; it might be simpler to use it.
In this example, a custom image is stored in the Advanced Customization Images settings for one of the access policy pages, a message box page. In the Advanced Customization view, the code for the message box page is updated to add a custom image to the right side of the page.
Note: This example includes tasks to complete in the General Customization view before you update the code and code changes to make in the Advanced Customization view.
You can add images for Access Policy Manager customization with the image browser. You can then select and use these images by means of settings within the Customization tool.
-
On the Main tab, click Access > Profiles / Policies > Customization > General.
The Customization tool appears in General Customization view, displaying Form Factor: Full/Mobile Browser settings.
-
On the menu bar, click Image Browser.
The image browser opens in a new screen.
-
Select the image filter method from the Filter Messages list.
- Select Default Images to view the included default Access Policy Manager images.
- Select User Uploaded Images to view the custom uploaded images.
-
Add and remove images.
- To add an image, click Add Image, select the image, and click Open.
- To remove an image, select the image in the image browser, and click Delete Image.
This example explains how to store a custom image for use in the advanced customization of an access policy message page. To follow this example, you need an access profile with an access policy that contains a Message Box action item.
Specify an image in the Advanced Customization Images setting for an object so that the image can be used in advanced customization of the object.
-
From the General Customization view, expand the Access Profiles folder.
Folders for each access profile display.
-
Expand the folder for an access profile.
-
Expand these folders Access Policy > Message Pages > Message Box.
Note: Message Box is the default name for a message box item. You might see a different name, or names if the access policy includes multiple message boxes; expand one of them.
Settings for the message box access policy item display.
-
Click the Advanced Customization Images setting.
Image names and values display in the right pane.
-
Click the value for one of the images.
If not already updated for use in advanced customization, the value is
/public/images/my/tr.gif.A pulldown menu icon displays.
-
Click the pulldown menu icon and click Replace.
A popup screen displays images.
-
To choose an image, click it; then click Change.
The popup screen closes. A new value displays for the image.
-
Press Enter to finalize the change, and click Save.
-
Make a note of the image name; you need it when you perform advanced customization.
You can use the image name as a variable in advanced customization of the parent object only. A message box page is the parent object in this example.
The image is now available for use in advanced customization of the message box item.
You need to have the value of the name of image available from the Advanced Customization Images setting for the particular message box that you want to update.
You remove and replace the code that specifies the image to display so that a customized image displays instead.
-
From the View list, select Advanced Customization.
The advanced customization (tree) view displays.
-
Navigate to the message box item to be customized.
-
Expand the Access Profiles folder and expand the folder for the access profile you want to customize.
-
Expand these folders Access Policy > Message Pages > Message Box.
Note: Message Box is the default name for a message box item. You might see a different name, or names if the access policy includes multiple message boxes; expand one of them.
Settings for the message box access policy item display.
-
-
Click message_box.inc.
Code displays in the Advanced Customization Editor.
-
Scroll down to this code.
<table id="main_table" class="message_box"> <tr> <? if( $GLOBALS["page_layout"] == "form_right" ){ ?><td id="main_table_image_cell"><img src="<? print( $GLOBALS["page_image_default"] ); ?>"></td><? } ?> <td id="main_table_info_cell"> <table id="interaction_table"> <tr> <td id="interaction_table_header"><? print('%[form_message]'); ?></td> </tr> <tr> <td class="interaction_table_text_cell"><? print('<a href="#" onclick="javascript:SubmitResult(1);return 1;">%[link]</a>'); ?></td> </tr> <tr> <td class="interaction_table_footer"></td> </tr> </table> </td> <? if( $GLOBALS["page_layout"] == "form_left" ){ ?><td id="main_table_image_cell"><img src="<? print( $GLOBALS["page_image_default"] ); ?>"></td><? } ?> </tr> </table> -
After the first table row open tag (
<tr>), remove this line of code.<? if( $GLOBALS["page_layout"] == "form_right" ){ ?><td id="main_table_image_cell"><img src="<? print( $GLOBALS["page_image_default"] ); ?>"></td><? } ?>The code that checks the page layout and specifies the image cell is removed.
-
Before the last table row close tag (
</tr>), remove this line of code.<? if( $GLOBALS["page_layout"] == "form_left" ){ ?><td id="main_table_image_cell"><img src="<? print( $GLOBALS["page_image_default"] ); ?>"></td><? } ?>Code that checks the page layout and specifies the image cell is removed.
-
Before the last table row close tag (
</tr>), insert this line of code, replacing nn with the image number.<td id="main_table_image_cell"><img src="%[image*nn*]"/></td> -
In the Advanced Customization Editor area, click Save Draft.
In the navigation tree, message_box.inc now displays in italics.
-
On the menu bar, click Save.
In the navigation tree, message_box.inc is no longer italicized. In the screen header, the Apply Access Policy link displays.
-
In the screen header, click the Apply Access Policy link.
A screen displays the access profile list with the access profile you have been editing selected.
-
Click the Apply Access Policy button.
You can now verify the result of this customization from a browser by trying to access a virtual server in which this access profile is specified.
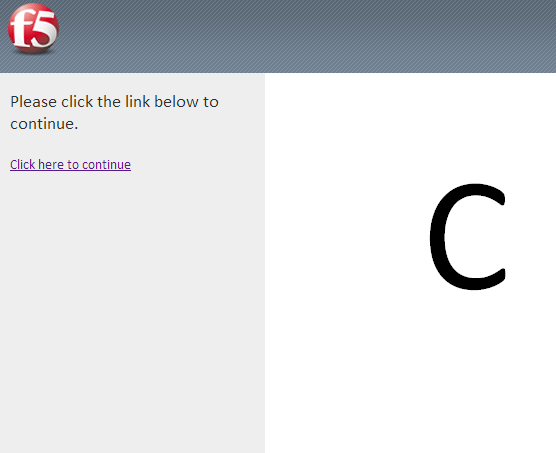
In this example, a custom image is stored in the Advanced Customization Images settings for an access profile. Then, the value of the image is used in advanced customization of the access profile page header. The header displays on all access policy pages, including the logon page. Then, the value of the image is used in additional advanced customization of the access policy logon page.

You can add images for Access Policy Manager customization with the image browser. You can then select and use these images by means of settings within the Customization tool.
-
On the Main tab, click Access > Profiles / Policies > Customization > General.
The Customization tool appears in General Customization view, displaying Form Factor: Full/Mobile Browser settings.
-
On the menu bar, click Image Browser.
The image browser opens in a new screen.
-
Select the image filter method from the Filter Messages list.
- Select Default Images to view the included default Access Policy Manager images.
- Select User Uploaded Images to view the custom uploaded images.
-
Add and remove images.
- To add an image, click Add Image, select the image, and click Open.
- To remove an image, select the image in the image browser, and click Delete Image.
To follow this example, you need an access profile with an access policy that contains a Logon Page action item.
Specify an image in the Advanced Customization Images setting for an access profile to use the image in advanced customization of the access profile and any access policy pages.
Note: An image stored in the Common settings for an access profile can be used in the advanced customization of any access policy page provided that you use the image value instead of the image name to specify the src attribute for the image.
-
From the General Customization view, expand the Access Profiles folder.
Folders for each access profile display.
-
Expand the folder for an access profile.
-
Expand the Common folder.
A list of settings displays.
-
Click the Advanced Customization Images setting.
Image names and values display in the right pane.
-
Click the value for one of the images.
If not already updated for use in advanced customization, the value is
/public/images/my/tr.gif.A pulldown menu icon displays.
-
Click the pulldown menu icon and click Replace.
A popup screen displays images.
-
To choose an image, click it; then click Change.
The popup screen closes. A new value displays for the image.
-
Press Enter to finalize the change, and click Save.
-
Click the value for the image again; copy the value in the field and paste it into a text file.
The value should be something like this:
/public/images/customization/Common/*ProfileName*_general_ui/image*00\_en*.png. You need to know the value when you perform advanced customization.
The image is now available for use in advanced customization of the message box item.
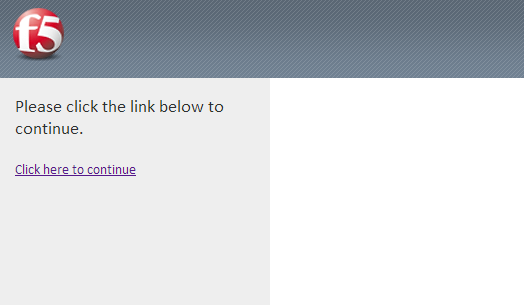
In this example, an image is added to the access profile page header. Make sure that the value of the image is available exactly as specified in the Advanced Customization Images setting for the particular access profile that you want to update.
Add code to specify an image to display in the page header.
-
From the View list, select Advanced Customization.
The advanced customization view displays.
-
In the navigation tree, expand the Access Profiles folder and expand the folder for the access profile you want to customize.
-
Expand the Common folder.
-
Click header.inc.
Code displays in the Advanced Customization Editor area of the screen.
-
Scroll to the end of the file to this code.
<table id="page_header"> <tr > <td id="header_leftcell"><img src='<?=$GLOBALS["header_logo"]?>'/></td> <td id="header_rightcell"><? if( !empty( $GLOBALS["header_show_disconnect_button"] ) ){ ?><button id="disconnect" onclick="javascript: /* window.onbeforeunload=window.document.onbeforeunload=window.document.body.onbeforeunload=null; */ if(top.F5_HT_logOut){ F5_HT_logOut(); }else{ window.location.href='/my.logout.php3'; }"><img src="%[disconnect_icon]"/><span>%[disconnect_text]</span></button><?} if( !empty( $GLOBALS["webtop_header_message"] ) ){?><span id="webtop_header_message"><img src='<?=$GLOBALS["fw_header_icon"]?>' id='fw_header_icon'><?=$GLOBALS["webtop_header_message"]?></span><?}?></td> </tr> </table> -
After the table close tag (`
`), insert this line of code.
```
<img src="*image\_value\_from\_advanced\_customization\_settings*" />
```
-
In the Advanced Customization Editor area, click Save Draft.
In the navigation tree, header.inc now displays in italics.
-
On the menu bar, click Save.
In the navigation tree, header.inc is no longer italicized. In the screen header, the Apply Access Policy link displays.
-
In the screen header, click the Apply Access Policy link.
A screen displays the access profile list with the access profile you have been editing selected.
-
Click the Apply Access Policy button.
-
To verify the result, in the General or Advanced Customization view, click Preview and navigate to and click any access policy page.
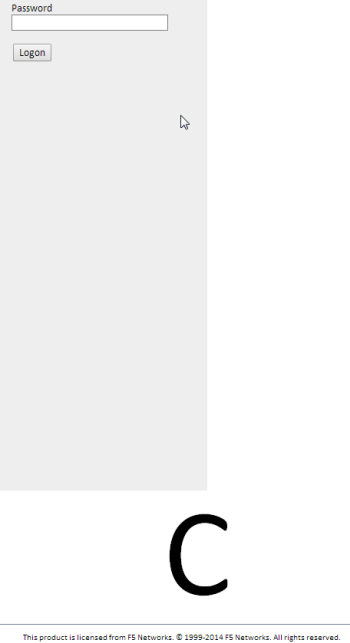
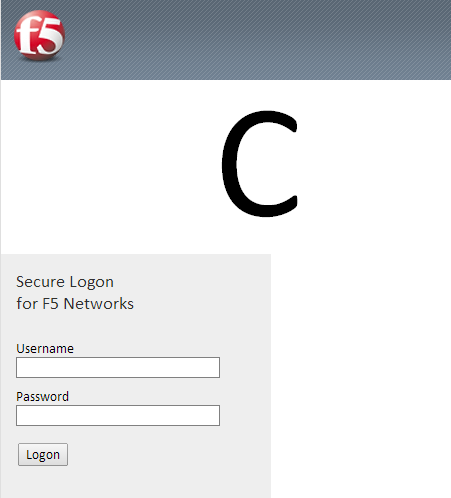
This example shows one way to change the image that is displayed on a logon page. Have the value of the image available exactly as it is specified in the Advanced Customization Images setting for the parent access profile.
Add code to specify an image to display after the logon page.
-
From the View list, select Advanced Customization.
The advanced customization view displays.
-
Navigate to the logon page item to be customized.
-
Expand the Access Profiles folder and expand the folder for the access profile you want to customize.
-
Expand these folders Access Policy > Logon Pages > Logon Page.
Note: Logon Page is the default name for a logon page item. You might see a different name, or names if the access policy includes multiple logon pages; expand one of them.
Settings for the logon page access policy item display.
-
-
Click logon.inc.
Code displays in the Advanced Customization Editor area of the screen.
-
Scroll to the end of the file to this code.
} --></script> </td> <? if( $GLOBALS["page_layout"] == "form_left" ){ ?><td id="main_table_image_cell"><img src="<? print('%[front_image]'); ?>"></td><? } ?> </tr> </table> <? include_customized_page("general_ui", "footer.inc"); ?> <? include_once("sam/webtop/renderer/vk.inc"); ?> <div id="MessageDIV" class="inspectionHostDIVSmall"></div> </body> </html> -
After the table close tag (`
`), insert this line of code.
```
<img src="*image\_value\_from\_advanced\_customization\_settings*" />
```
-
In the Advanced Customization Editor area, click Save Draft.
In the navigation tree, login.inc now displays in italics.
-
On the menu bar, click Save.
In the navigation tree, logon.inc is no longer italicized. In the screen header, the Apply Access Policy link displays.
-
In the screen header, click the Apply Access Policy link.
A screen displays the access profile list with the access profile you have been editing selected.
-
Click the Apply Access Policy button.
-
To verify the result, in the General or Advanced customization view, click Preview and navigate to and click any access policy page.