Updated Date: 07/07/2026
RADIUS Authentication
Access Policy Manager supports authenticating and authorizing the client against external RADIUS servers. When a client connects with the user name and password, Access Policy Manager authenticates against the external server on behalf of the client, and authorizes the client to access resources if the credentials are valid.
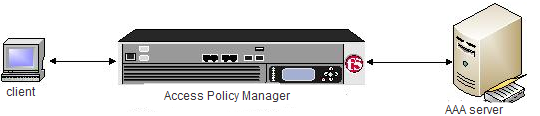
- The client requests access to network resources through Access Policy Manager.
- Access Policy Manager then issues a RADIUS Access Request message to the RADIUS server, requesting authorization to grant access.
- The RADIUS server then processes the request, and issues one of three responses to Access Policy Manager: Access Accept, Access Challenge, or Access Reject.
Note: If using LDAP or RADIUS authentication in such a way that requires multiple authentication requests, then One Time Password will not work (because password usage is reached on the second request).
Using AAA high availability with Access Policy Manager (APM), you can configure multiple authentication servers to process requests, so that if one authentication server goes down or loses connectivity, the others can resume authentication requests, and new sessions can be established, as usual.
Note: Although new authentications fail if the BIG-IP system loses connectivity to the server, existing sessions are unaffected provided that they do not attempt to re-authenticate.
APM supports the following AAA servers for high availability: RADIUS, Active Directory, LDAP, CRLDP, and TACACS+. APM supports high availability by providing the option to create a pool of server connections when you configure the supported type of AAA server.
Note: If you use AAA with pools, such as RADIUS pools or Active Directory pools, APM assigns each pool member with a different number for the pool member’s priority group value. APM must define each pool member with a different priority group because AAA load balancing is not used. The priority group number increases automatically with each created pool member. Alternative AAA pool configurations can be defined manually using the full flexibility of Local Traffic Manager (LTM) if high availability is desired.
When you use RADIUS as the authentication method for AAA high availability, there are general guidelines that you must follow when you set up your server connections.
- In a non-high availability environment, both the Direct and Use Pool options use the self IP address as a source IP address of the packet reaching the RADIUS server. For this scenario, you just need to add one IP address to the RADIUS allowed IP list to achieve this.
- In a high availability environment where the Use Pool option is used, the floating self IP address is used as a source IP of the RADIUS packet reaching the back-end. For this scenario, you need to add one self IP address (which is floating self IP address) to the RADIUS allowed IP list because the IP address is used even after a failover occurs.
- In a high availability environment where the Direct option is used, the static self IP address is used as a source IP address of the RADIUS packet reaching the back-end. In this scenario, you need to add the self IP address from both active and standby devices to the RADIUS allowed IP list so that when failover occurs, the self IP address from the second device is accepted by the RADIUS server.
For RADIUS authentication, Access Policy Manager (APM) converts an attribute value to hex if it contains unprintable characters, or if it is the class attribute. APM converts the class attribute to hex even if it contains only printable values (by attribute type). No other attributes are encoded to hex if they do not contain unprintable characters.
1bf80e04.session.radius.last.attr.class 62 /
0x54230616000001370001ac1d423301caa87483dadf740000000000000007243be90d.session.radius.last.attr.class 119 0x6162636465666768696 /
a6b6c6d6e6f707172737475767778797a | 0x54220615000001370001ac1d423301caa87483 /
dadf7400000000000000063888eb70.session.radius.last.attr.login-lat-group 37 /
0x6d7920bda12067726f757032 | mygroup1In this case, only values that are unprintable are encoded to hex.
If you add RADIUS authentication to an existing access policy, you already have an access profile configured and the access policy might already include a logon access policy item.
The Access Policy Manager (APM) is a network access server (NAS) that operates as a client of the server configured here.
-
On the Main tab, click Access > Authentication > RADIUS.
The RADIUS servers screen opens.
-
Click Create.
The New Server properties screen opens.
-
In the Name field, type a unique name for the authentication server.
-
For the Mode setting, select Authentication.
-
For the Server Connection setting, select one of these options:
Note: When configuring a RADIUS AAA server that is located in a nondefault route domain, you must select Use Pooland specify the pool containing the RADIUS server.
-
Select Use Pool to set up high availability for the AAA server.
Note: If you select Use Pool, the Timeout value does not apply.
-
Select Direct to set up the AAA server for standalone functionality.
-
-
If you selected Use Pool, type a name in the Server Pool Name field.
You create a pool of servers on this screen.
-
Provide the addresses required for your server connection:
-
If you selected Direct, type an IP address in the Server Address field.
-
If you selected Use Pool, for each pool member you want to add, type an IP address in the Server Addresses field and click Add.
Note: When you configure a pool, you have the option to type the server address in route domain format: IPAddress%RouteDomain.
-
-
In the Authentication Service Port field, type the authentication port number of your server. The default is 1812.
-
In the Secret field, type the shared secret password of the server.
-
In the Confirm Secret field, re-type the shared secret password of the server.
-
Click Finished.
The new server displays on the list.
The new AAA server displays on the RADIUS Servers list.
You create an access profile to provide the access policy configuration for a virtual server that establishes a secured session.
-
On the Main tab, click Access > Profiles / Policies > Access Profiles (Per-Session Policies).
The Access Profiles (Per-Session Policies) screen displays.
-
Click Create.
The New Profile screen displays.
-
In the Name field, type a unique name for the access profile.
-
From the Profile Type list, select one these options:
-
ALL: Select to support LTM-APM and SSL-VPN access types.
-
LTM-APM: Select for a web access management configuration.
-
OAuth-Resource Server: For configuring APM to act as an OAuth resource server that provides an OAuth authorization layer into an API gateway.
-
RDG-RAP: Select to validate connections to hosts behind APM when APM acts as a gateway for RDP clients.
-
SSL-VPN: Select to configure network access, portal access, or application access. (Most access policy items are available for this type.)
-
SSO: Select to configure matching virtual servers for Single Sign-On (SSO).
Note: No access policy is associated with this type of access profile
-
SWG - Transparent: Select to configure access using Secure Web Gateway transparent forward proxy.
-
SWG - Explicit: Select to configure access using Secure Web Gateway explicit forward proxy.
-
System Authentication: Select to configure administrator access to the BIG-IP system (when using APM as a pluggable authentication module).
-
Identity Service: Used internally to provide identity service for a supported integration. Only APM creates this type of profile.
Note: You can edit Identity Service profile properties.
Note: Depending on licensing, you might not see all of these profile types.
Additional settings display.
-
-
From the Profile Scope list, select one these options to define user scope:
- Profile: Access to resources behind the profile.
- Virtual Server: Access to resources behind the virtual server.
- Global: Access to resources behind any access profile with global scope.
- Named: Access for SSL Orchestrator users to resources behind any access profile with global scope.
- Public: Access to resources that are behind the same access profile when the Named scope has configured the session and is checked based on the value and string configured in the Named scope field.
-
For the Customization Type, use the default value Modern. For additional information, refer to the Creating an access profile topic.
-
The Client Inspection Settings option appears when the Profile Type is selected as All or SSL-VPN under the General Properties section.
-
The Check Interval option defines time (in seconds) between periodic inspections of recurring endpoint checks configured in the access policy to ensure compliance of the client with the required security policies while the session remains active. Any incompliance activity results in the VPN session termination. Default value is 90 seconds.
Note: Note: This option is applicable only for the upcoming F5 Access for Mac OS client releases.
-
In the Language Settings area, add and remove accepted languages, and set the default language.
If any browser language does not match with the accepted languages list, the browser uses the default language.
-
Click Finished.
The access profile displays in the Access Profiles List. Default-log-setting is assigned to the access profile.
Confirm that the correct log settings are selected for the access profile to ensure that events are logged as you intend.
Note: Log settings are configured in the Access > Overview > Event Log > Settings area of the product. They enable and disable logging for access system and URL request filtering events. Log settings also specify log publishers that send log messages to specified destinations.
-
On the Main tab, click Access > Profiles / Policies > Access Profiles (Per-Session Policies).
The Access Profiles (Per-Session Policies) screen displays.
-
Click the name of the access profile that you want to edit.
The properties screen opens.
-
On the menu bar, click Logs.
The access profile log settings display.
-
Move log settings between the Available and Selected lists.
You can assign up to three log settings that enable access system logging to an access profile. You can assign additional log settings to an access profile provided that they enable logging for URl request logging only.
Note: Logging is disabled when the Selected list is empty.
-
Click Update.
An access profile is in effect when it is assigned to a virtual server.
You configure an access policy with a RADIUS Auth action to provide RADIUS authentication as one of authentication options for users trying to gain accesss.
Note: You can use RADIUS authentication in addition to other authentication types. You can require that users pass at least one type of authentication or that they pass multiple types of authentication.
-
On the Main tab, click Access > Profiles / Policies > Access Profiles (Per-Session Policies).
The Access Profiles (Per-Session Policies) screen displays.
-
In the Per-Session Policy column, click the Edit link for the access profile you want to configure.
The visual policy editor opens the access policy in a separate screen.
-
Click the (+) icon anywhere in the access policy to add a new item.
Note: Only an applicable subset of access policy items is available for selection in the visual policy editor for any access profile type.
A popup screen opens, listing predefined actions on tabs such as General Purpose, Authentication, and so on.
-
On the Logon tab, select Logon Page and click the Add Item button.
The Logon Page Agent properties screen opens.
-
Make any changes that you require to the logon page properties and click Save.
The properties screen closes and the policy displays.
-
Click the (+) icon anywhere in the access policy to add a new item.
Note: Only an applicable subset of access policy items is available for selection in the visual policy editor for any access profile type.
A popup screen opens, listing predefined actions on tabs such as General Purpose, Authentication, and so on.
-
From the Authentication tab, select RADIUS Auth and click Add Item.
The popup screen closes. A Properties popup screen opens.
-
On the Properties popup screen from the AAA Server list, select the AAA RADIUS server you configured previously and click Save.
The popup screen closes and the visual policy editor displays.
-
Complete the policy:
-
Add any additional policy items you require.
-
Change the ending from Deny to Allow on any access policy branch on which you want to grant access.
-
-
Click Apply Access Policy to save your configuration.
This creates an access policy that collects user credentials and uses them to authenticate with a RADIUS server.
To apply this access policy to network traffic, add the access profile to a virtual server.
Note: To ensure that logging is configured to meet your requirements, verify the log settings for the access profile.
When creating a virtual server for an access policy, specify an IP address for a single host as the destination address.
-
On the Main tab, click Local Traffic > Virtual Servers.
The Virtual Server List screen opens.
-
Click Create.
The New Virtual Server screen opens.
-
In the Name field, type a unique name for the virtual server.
-
For the Destination Address/Mask setting, confirm that the Host button is selected, and type the IP address in CIDR format.
The supported format is address/prefix, where the prefix length is in bits. For example, an IPv4 address/prefix is 10.0.0.1 or 10.0.0.0/24, and an IPv6 address/prefix is ffe1::0020/64 or 2001:ed8:77b5:2:10:10:100:42/64. When you use an IPv4 address without specifying a prefix, the BIG-IP system automatically uses a /32 prefix.
Note: The IP address you type must be available and not in the loopback network.
-
In the Service Port field:
- If you want to specify a single service port or all ports, confirm that the Port button is selected, and type or select a service port.
- If you want to specify multiple ports other than all ports, select the Port List button, and confirm that the port list that you previously created appears in the box.
-
From the HTTP Profile (Client) list, select a previously-created HTTP/2 profile for client-side traffic.
-
If you use server SSL for this connection, from the SSL Profile (Server) list, select a server SSL profile.
-
If you use client SSL for this profile, from the SSL Profile (Client) list, select a client SSL profile.
-
In the Access Policy area, from the Access Profile list, select the access profile that you configured earlier.
-
From the Connectivity Profile list, select a connectivity profile.
You can select the default connectivity profile, connectivity if you have not defined a specific profile for the traffic that is directed to this virtual server.
-
Click Finished.
To effectively test that high availability works for your authentication servers, you should have two servers that are accessible, where you can remove one of them from the network.
Note: High availability is supported for these authentication server types only: RADIUS, Active Directory, LDAP, CRLDP, and TACACS+.
If you configured a supported authentication server type to use a pool of connection servers, you can test the configuration using these steps.
-
Begin a tcpdump on the Access Policy Manager, using a protocol analyzer, and scanning for packets destined for the specific port for your authentication server.
-
Log in to the virtual server with both servers active.
-
Using the tcpdump records, verify that the requests are being sent to the higher priority server.
-
Log out of the virtual server.
-
Disable the higher-priority server.
-
Log in to the virtual server again.
-
Verify that the request is being sent to the other server.
-
Log out again, re-enabling the server, and try one more time to verify that the new requests are being sent to the high priority server.
The following table lists the specific RADIUS attributes that Access Policy Manager sends with RADIUS requests.
| Attribute | Purpose |
|---|---|
| User-Name | Indicates the name of the authenticated user. |
| User-Password | Indicates the password of the authenticated user. |
| NAS-IP-Address | Indicates the identifying IP Address of the NAS. |
| NAS-IPv6-Address | Indicates the identifying IPv6 Address of the NAS. |
| NAS-Identifier | Indicates the identifying name of the NAS . |
| Service-Type | Indicates the type of service the user has requested. |
| NAS-Port | Indicates the physical port number of the NAS that is authenticating the user. |
When the RADIUS Auth access policy item runs, it populates session variables which are then available for use in access policy rules. The tables list the session variables for the RADIUS authentication access policy item and for a logon access policy item.
| Session Variable | Description |
|---|---|
| session.RADIUS.last.result | Provides the result of the RADIUS authentication. The available values are:
|
| session.RADIUS.last.attr.$attr_name | $attr_name is a value that represents the user’s attributes received during RADIUS authentication. Each attribute is converted to separate session variables. |
| session.RADIUS.last.errmsg | Displays the error message for the last login. If session.RADIUS.last.result is set to 0, then session.RADIUS.last.errmsg might be useful for troubleshooting purposes. Example: c76a50c0.session.RADIUS.last.errmsg 13 Access-Reject |
| Session Variable | Description |
|---|---|
| session.logon.last.username | Provides user credentials. The username string is stored after encrypting, using the system’s client key. |
| session.logon.last.password | Provides user credentials. The password string is stored after encrypting, using the system’s client key. |
You might run into problems with RADIUS authentication and accounting in some instances. Follow these tips to try to resolve any issues you might encounter.
| Possible error messages | Possible explanations and actions |
|---|---|
| Authentication failed due to timeout |
|
| Authentication failed due to RADIUS access reject |
|
| Action | Steps |
|---|---|
| Check to see if your access policy is attempting to perform authentication |
|
| Check the RADIUS Server configuration |
|
| Confirm network connectivity |
|
| Capture a TCP dump |
|