Applies To:
Show Versions
BIG-IP AAM
- 11.5.10, 11.5.9, 11.5.8, 11.5.7, 11.5.6, 11.5.5, 11.5.4, 11.5.3, 11.5.2, 11.5.1
Overview: Acceleration policies
An acceleration policy is a collection of defined rule parameters that dictate how the BIG-IP system handles HTTP requests and responses. The BIG-IP system uses two types of rules to manage content: matching rules and acceleration rules. Matching rules are used to classify requests by object type and match the request to a specific acceleration policy. Once matched to an acceleration policy, the BIG-IP system applies the associated acceleration rules to manage the requests and responses.
Depending on the application specific to your site, information in requests can sometimes imply one type of response (such as a file extension of .jsp), when the actual response is a bit different (like a simple document). For this reason, the BIG-IP system applies matching rules twice: once to the request, and a second time to the response. This means that a request and a response can match to different acceleration rules, but it ensures that the response is matched to the acceleration policy that is best suited to it.
Task summary for using acceleration policies to manage and respond to HTTP requests
Perform these tasks to use policies to manage and respond to HTTP requests.
Task list
Accessing the Policy Viewer screen
Copying an acceleration policy
Creating a user-defined acceleration policy from a predefined acceleration policy
Creating a new user-defined acceleration policy
Importing an acceleration policy
Publishing a user-defined acceleration policy
Modifying an acceleration policy's rules
Viewing rules for an acceleration policy
Overview: Policy Editor screen
From the Policy Editor screen, you can view the matching rules and acceleration rules for user-defined and predefined acceleration policies, as well as create or modify user-defined acceleration policies.
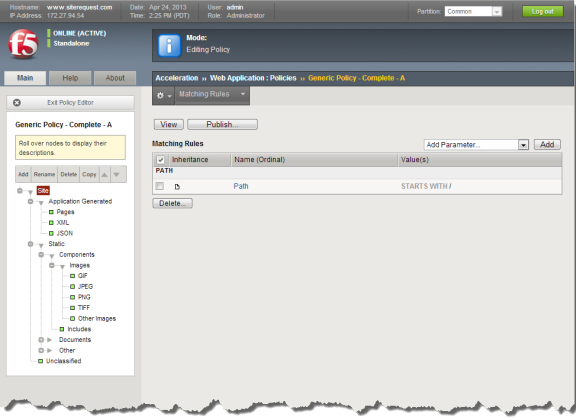 Policy Editor screen for an example acceleration policy
Task summary for using the Policy Editor
Perform these tasks to use the Policy Editor.


