Applies To:
Show Versions
BIG-IP AAM
- 14.1.3, 13.1.5, 13.1.4, 13.1.3, 13.1.1, 13.1.0, 13.0.1, 13.0.0
BIG-IP APM
- 14.1.3, 14.1.2, 14.0.1, 14.0.0, 13.1.5, 13.1.4, 13.1.3, 13.1.1, 13.1.0, 13.0.1, 13.0.0
Overview: Acceleration policies
An acceleration policy is a collection of defined rule parameters that dictate how the BIG-IP® system handles HTTP requests and responses. The BIG-IP system uses two types of rules to manage content: matching rules and acceleration rules. Matching rules are used to classify requests by object type and match the request to a specific acceleration policy. Once matched to an acceleration policy, the BIG-IP system applies the associated acceleration rules to manage the requests and responses.
Depending on the application specific to your site, information in requests can sometimes imply one type of response (such as a file extension of .jsp), when the actual response is a bit different (like a simple document). For this reason, the BIG-IP system applies matching rules twice: once to the request, and a second time to the response. This means that a request and a response can match to different acceleration rules, but it ensures that the response is matched to the acceleration policy that is best suited to it.
Task summary for using acceleration policies to manage and respond to HTTP requests
Perform these tasks to use policies to manage and respond to HTTP requests.
Task summary
Accessing the Policy Viewer screen
Copying an acceleration policy
Creating a user-defined acceleration policy from a predefined acceleration policy
Creating a new user-defined acceleration policy
Importing an acceleration policy
Publishing a user-defined acceleration policy
Modifying an acceleration policy's rules
Viewing rules for an acceleration policy
Saving an acceleration policy to an XML file
Deleting a user-defined acceleration policy
Overview: Policy Editor screen
From the Policy Editor screen, you can view the matching rules and acceleration rules for user-defined and predefined acceleration policies, as well as create or modify user-defined acceleration policies.
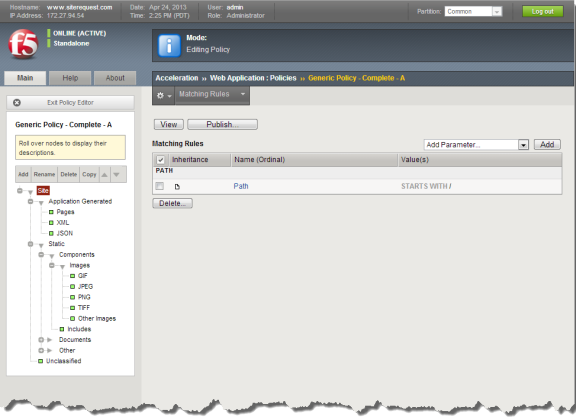
Policy Editor screen for an example acceleration policy
Task summary for using the Policy Editor
Perform these tasks to use the Policy Editor.
Task summary
Accessing the Policy Editor screen
Viewing the Policy Tree for an acceleration policy
Differentiating Requests and Responses with Variation Rules
Overview: Variation rules
When the BIG-IP® system caches responses from the origin web server, it uses certain HTTP request parameters to create a Unique Content Identifier (UCI). The BIG-IP system stores the UCI in the form of a compiled response, and uses the UCI to easily match future requests to the correct content in the module's cache.
You can configure variation rules to add or modify the parameters on which the BIG-IP system bases its caching process. If the BIG-IP system receives two requests that are identical except for the value of a query parameter defined in the variation rule, it creates a different UCI for each, and caches each response under its unique UCI.
Consider a site that receives requests from customers and partners, and wants to serve different content to each. For this site, you could create a variation rule in which you specify that when a request contains a version cookie set to a value of 1, the BIG-IP system serves a page specifically for customers, and when the version cookie is set to a value of 2, it serves a page specifically for partners. For this rule, the BIG-IP system caches the following three compiled responses.
- For content produced for Cookie: version=1.
- For content produced for Cookie: version=2.
- For content produced when the version cookie does not appear in the request.
Configuring variation rule settings
Configuring ambiguous query parameters as unnamed
Variation rule example
This example shows a variation rule for a user-defined acceleration policy. For this example site, you have three top-level nodes on the Policy Tree.
- Home. This branch node specifies the rules related to the home page.
-
Applications. This branch node specifies the rules related to the
applications for the site, with the following leaf nodes.
- Default. This leaf node specifies the rules related to non-search related applications.
- Search. This leaf node specifies the rules related to your site’s search application.
- Images. This branch node specifies the rules related to graphics images.
This site also has the following two considerations.
- It needs to provide different branding information if the REFERER request header begins with, http://www.siterequest.com. Any other value for the REFERER request header does not affect the content served by your site.
- It uses a query parameter called sessionID to track site users. This query parameter does not affect page content, and is used for tracking purposes only.
For this example, you create the following two variation rules.
- REFERRER rule. You base this rule on the REFERER data type, and set it on the Applications node.
- Query Parameter rule. You base this rule on the Query Parameter data type, and set on the Search node.


