You can configure BIG-IP
Global Traffic Manager
(GTM) systems in collections called GTM synchronization groups. All
BIG-IP GTM systems in the same GTM synchronization group have the same
rank, exchange heartbeat messages, and share probing responsibility.
Configuration changes to one device in a GTM synchronization group are synchronized
incrementally across the devices in the group. That is, only the data that has changed
on a GTM device is synchronized to the other devices in the group. Although incremental
synchronization is the default behavior, if an incremental synchronization fails, the
system automatically performs a full configuration synchronization.
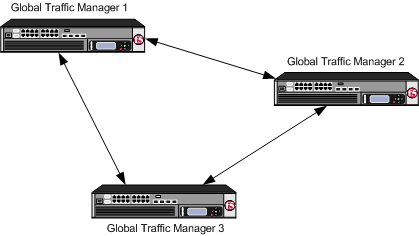 BIG-IP GTM systems in a GTM synchronization group
When you add a BIG-IP
(GTM) system to a network that contains older BIG-IP GTM systems,
the devices can exchange heartbeat messages, even though the BIG-IP software versions
are different. However, to add a GTM to a configuration synchronization group, you must
run the gtm_add script.
Task Summary
When adding a BIG-IP GTM to a
network that already contains BIG-IP GTM systems in a synchronization group, perform the
following tasks.
Defining a server on the existing GTM
Ensure that a data center where the new GTM system resides is
available in the configuration of the existing GTM.
Define a new server, on the existing GTM system, to represent the new GTM
system.
-
On the Main tab, click .
The Server List screen opens.
-
Click Create.
The New Server screen opens.
-
In the Name field, type a name for the server.
Important: Server names are limited to 63 characters.
-
From the Product list, select BIG-IP System
(Single).
The server type determines the metrics that the system can collect from the
server.
-
In the Address List area, add the IP address of the server.
Important: You must use a self IP address for a BIG-IP system; you cannot use the management IP
address.
-
From the Data Center list, select the data center where
the server resides.
-
From the Virtual Server Discovery list, select how you
want virtual servers to be added to the system.
| Option |
Description |
| Disabled |
The system does not use the discovery feature to automatically add
virtual servers. This is the default value. Use this option for a
standalone GTM system or for a GTM/LTM combo
system when you plan to manually add virtual servers to the system, or
if your network uses multiple route domains. |
| Enabled |
The system uses the discovery feature to automatically add virtual
servers. Use this option for a GTM/LTM combo system when you want the
GTM system to discover LTM virtual servers. |
| Enabled (No Delete) |
The system uses the discovery feature to automatically add virtual
servers and does not delete any virtual servers that already exist. Use
this option for a GTM/LTM combo system when you want the GTM system to
discover LTM virtual servers. |
-
In the Virtual Server List area, if you selected
Disabled from the Virtual Server
Discovery list, specify the virtual servers that are resources
on this server.
-
In the Name field, type the name of the virtual
server.
-
In the Address field, type the IP address of the
virtual server.
-
From the Service Port list, select the port the
server uses.
-
Click Add.
-
Click Create.
The Server List screen opens displaying the new server in the
list.
The status of the newly defined GTM system is Unknown, because you have not yet run
the gtm_add script.


