Updated Date: 06/22/2026
Overview: Access Policies for F5 Access
You can configure separate access policy branches for F5 Access.
F5 Access does not support client-side checks; however, you can configure an access policy that provides network access for macOS clients by using any of these methods:
- Create an access policy using Client-Side Capability. This provides a branch for clients that do not support client-side checks. Assign authentication and a network access resource to this branch.
- Use an existing access policy with client-side checks. The macOS client will fail to the fallback branch of the first client-side check, if the logon mode is native. If the logon mode is Web Logon, user interaction is required to proceed with the fallback branch. Assign authentication and a network access resource to the fallback branch.
- Add a Client OS Access Policy item, and assign authentication and resources to the macOS branch.
F5 Access for macOS is detected with the following access policy items:
| Access policy item | Value |
|---|---|
| Client Type | F5 Access |
| Client OS | MacOS |
Configure an access policy to identify and allow access to macOS devices.
-
On the Main tab, click Access > Profiles / Policies.
The Access Profiles List screen opens
-
Click Create.
The New Profile screen opens.
-
In the Name field, type a name for the access profile.
Note: An access profile name must be unique among all access profile and any per-request policy names.
-
From the Profile Type list, select SSL-VPN.
Additional settings display.
-
From the Profile Scope list, retain the default value or select another.
- Profile: Gives a user access only to resources that are behind the same access profile. This is the default value.
- Virtual Server: Gives a user access only to resources that are behind the same virtual server.
- Global: Gives a user access to resources behind any access profile that has global scope.
-
In the Language Settings area, add and remove accepted languages, and set the default language.
A browser uses the highest priority accepted language. If no browser language matches the accepted languages list, the browser uses the default language.
-
Click Finished.
-
Click the name of the access profile for which you want to edit the access policy.
The properties screen opens for the profile you want to edit.
-
Click the Access Policy tab.
-
In the General Properties area, click the Edit Access Policy for Profile profile_name link.
The visual policy editor opens the access policy in a separate screen.
-
Click Add Item.
The screen is not active while the visual policy editor creates the action. The screen closes and a Properties screen displays.
-
Click the Endpoint Security (Server-Side) tab, and select Client OS.
-
Click Save.
-
On the MacOS branch, click Add Item.
-
Click the Endpoint Security (Server-Side) tab, and select Client Type.
-
Click Save.
-
On the F5 Access branch, add the authentication and resource actions you require. For example, add a Logon Page, Client Certificate, and Resource Assign actions.
-
When you have finished configuring the access policy, click Apply Access Policy.
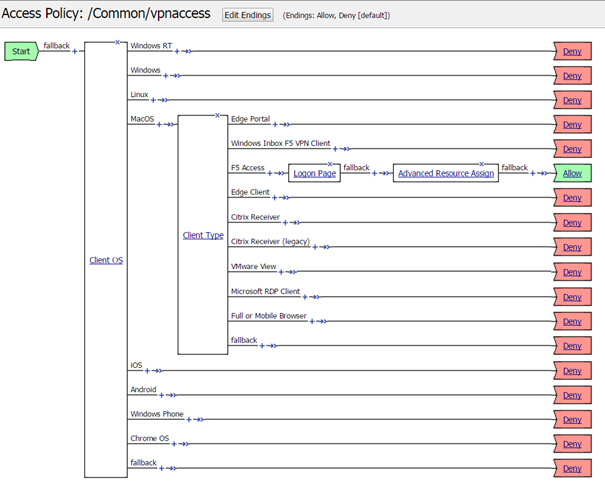
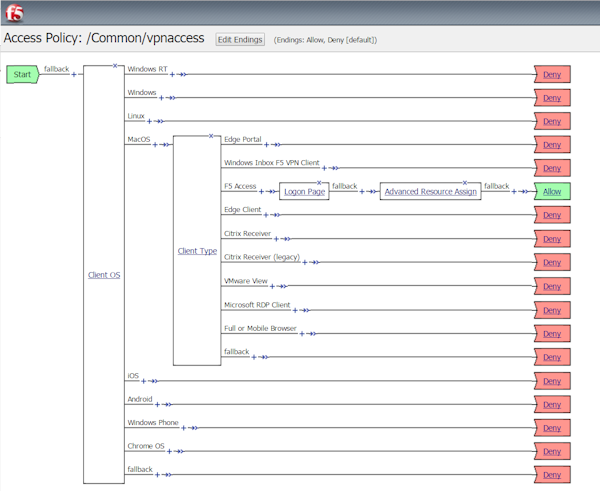
You can configure an access policy branch to direct macOS device users to F5 Access, and direct non-F5 Access device users to a fallback branch.
This example displays a simple access policy.