Applies To:
Show Versions
BIG-IP GTM
- 11.6.5, 11.6.4, 11.6.3, 11.6.2, 11.6.1
Replacing a DNS Server with BIG-IP GTM
Overview: Replacing a DNS server with BIG-IP GTM
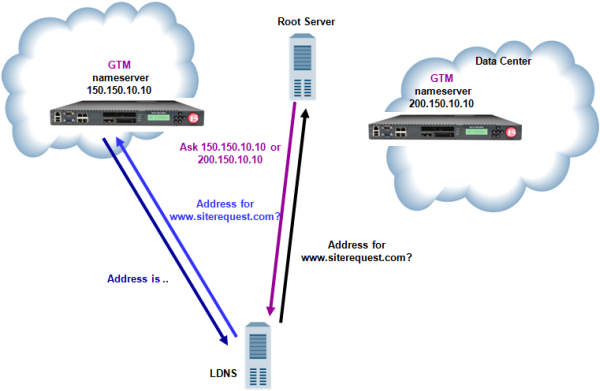
Traffic flow when BIG-IP GTM replaces DNS server
About listeners
A listener is a specialized virtual server that passively checks for DNS packets on port 53 and the IP address you assign to the listener. When a DNS query is sent to the IP address of the listener, BIG-IP GTM™ either handles the request locally or forwards the request to the appropriate resource.
Task summary
Perform these tasks to replace a DNS server with BIG-IP GTM.
Configuring BIND servers to allow zone transfers
When you want to improve the speed of responses to DNS queries you can configure a BIND server to allow zone transfers only to the DNS Express™ engine on the BIG-IP system. You do this by adding an allow-transfer statement to named.conf on the BIND server.
allow-transfer {
        localhost; <self IP address from which zone transfer request is sent to the server>;
    };
allow-transfer { localhost; 10.10.10.1 ; };
Performing zone transfers from the legacy DNS server
Creating a self IP address using the IP address of the legacy DNS server
Designating GTM as the primary server for the zone
Creating listeners to alert GTM to DNS traffic destined for the system
Creating a wide IP
Implementation result
BIG-IP® GTM™ replaces the legacy DNS server as the primary authoritative name server for the zone. BIG-IP GTM handles all incoming DNS traffic, whether destined for a wide IP or handled by the BIND instance on the system.


