Manual Chapter : Modify and Manage Layer 7 Security Objects

Applies To:

Show Versions Show Versions

BIG-IQ Centralized Management

  • 6.1.0
Manual Chapter

Modify and Manage Layer 7 Security Objects

Modifying object Layer 7 security to improve application protection

On BIG-IP devices, virtual servers have Layer 7 (L7) security objects (such as DoS profiles, logging profiles, or Web Application Security policies) that detect and mitigate bad traffic to an application. After configuring your virtual servers, you can manage the application security settings using BIG-IQ Centralized Management. The L7 Security Dashboard ( Monitoring > DASHBOARDS > L7 Security ) lists all deployed applications and virtual servers that are managed by your system. You can view all your managed applications and virtual servers to determine whether the existing protection and logging configuration defines your protection mode.

Adjust Layer 7 protection for applications and virtual servers

To view object information you must have the following:
  • A Data Collection Device (DCD) configured to your BIG-IQ system.
  • Managed BIG-IP devices have ASM provisioned for managing security policies.
  • The BIG-IQ system has Shared Security (SSM) discovered to manage virtual servers' DoS and logging profiles.
  • Managed BIG-IP devices have AVR provisioned (recommended).
You identify the Layer 7 security configuration of your managed applications and virtual servers so you can modify the security objects that improve security.
Note: Changes to your application's Layer 7 security are deployed immediately. Changes to virtual servers' Layer 7 security require a manual deployment.
  1. At the top of the screen, click Monitoring.
  2. Click DASHBOARDS > L7 Security .
    This displays all monitored objects.
  3. To filter objects by a specific protection mode, you can toggle an option from the PROTECTION MODE area at the top left of the screen.
  4. Select one or more objects that you want to edit
    Note: If you are attaching a DoS profile, it is recommended to configure only one DoS profile per application.
  5. To attach a security object to your selected object, click Attach and select a security object type from the list.
    1. From the Choose resource to attach window select a security object resource.
    2. Click Continue.
  6. To remove a security object from your selected object:
    1. Click Detach and select the security object type from the list.
    2. In the Detach Confirmation popup screen, click Continue to confirm the security object's removal.
Changes to applications will render an update for the deployment process, and changes are immediately reflected in the L7 Security Dashboard. If changes were made to a virtual server's security objects (either attach or detach), you manually deploy these changes using the Configuration > LOCAL TRAFFIC > Virtual Servers screen.
To monitor overall health and status of all your applications, go to Applications > APPLICATIONS . For more information about managing your applications, refer to the topics in BIG-IQ Centralized Management: Monitoring and Managing Application Services on support.f5.com.

Object protection modes for Layer 7 security

The L7 Security Dashboard ( Monitoring > DASHBOARDS > L7 Security ) displays objects with different protection modes. Protected objects consist of the applications or virtual severs that have a Web Application Security policy or DoS profile.

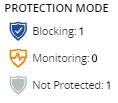
Object protection modes. The PROTECTION MODE area on this screen displays the number of managed objects for each protection mode.

Blocking

A virtual server has a Blocking security mode if it has at least one of the following security configurations. Likewise, an application has a Blocking security mode if at least one of its assigned virtual servers has a Blocking protection mode.
Web Application Security Policy
The policy's Enforcement Mode is set to Blocking.
DoS Profile
The operation mode for TPS-based Detection is set to Blocking.
and/or
The operation mode for Behavioral & Stress-based Detection is set to Blocking.

Monitoring

A virtual server has a Monitoring security mode if it has at least one of the following security configurations, and has no Blocking security configurations. Likewise, an application has a Monitoring security mode if at least one of its assigned virtual servers has a has a Monitoring protection mode and none of its virtual servers has a Blocking protection mode.
Web Application Security Policy
The policy's Enforcement Mode is set to Transparent.
DoS Profile
The operation mode for TPS-based Detection is set to Blocking .
and/or
The operation mode for Behavioral & Stress-based Detection is set to Transparent.

Not Protected

A virtual server is not protected if it does not have a Monitoring or Blocking configuration. An application is not protected if all of its assigned virtual servers are not protected.

Protected objects with Layer 7 Security
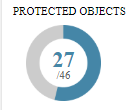
The Layer 7 Security screen ( Monitoring > DASHBOARDS > L7 Security ) displays the applications and virtual servers monitored by BIG-IQ Centralized Management. Protected objects consist of the applications or virtual severs that have a Web Application Security policy or DoS profile with an enabled protection status. The PROTECTED OBJECTS area on this screen displays the number of protected objects, out of the total objects. The following describes the object count for this screen, regardless of protection status:

The number of managed protected objects, out of all the objects managed by your system.
Virtual Server
A stand-alone virtual server counts as a managed object (protected or unprotected) when it is not assigned to an application. The virtual server must have at least one HTTP profile. Once it is assigned to an application, the virtual server is no longer included in the total object count.
Application
Each application counts as an object (protected or unprotected). The application includes all its assigned virtual servers.

L7 Security Alerts

Security alerts in the TRENDS AND IMPACTS area of the L7 Security Dashboard ( Monitoring > DASHBOARDS > L7 Security ) notify you of the number of objects reporting Web Application Security policy (Web Exploits) or DoS profile (L7 DDoS Attacks) events over the past day (trend charts report the past week). These alerts indicate that a protected object (application or virtual server) recently experienced an increased rate in performance issues. To view data the corresponds with these traffic events go to Monitoring > DASHBOARDS > DDoS > HTTP Analysis To view the status of your deployed applications, go to Applications > APPLICATIONS > . .

Alert Description Indication Default Thresholds Action (if applicable)
BAD TRAFFIC TRENDS The number of objects with a significant increase in traffic with any violation rating. Increase in transactions with any violation rating.

Web Exploits: The average number of transactions with a violation rating exceeded 10% in the past 24 hours and increased by a ratio of 0.1% out of all traffic over the past week.

L7 DDoS Attacks: The average volume of active, simultaneous attacks increased in the past 24 hours.

Investigate transactions and fine tune your security policy/profile for new threats.
POTENTIALLY HARMFUL ATTACKS The number of objects with a transparent protection mode (Monitoring), that have an increase in bad traffic. Increase in transactions with high violation rating.

Web Exploits: The rate of transactions with violation rating of 4 or 5 exceeded 0.1% in the past 24 hours.

L7 DDoS Attacks: The volume of simultaneous active attacks increased in the past 24 hours.

Change security policy or profile to Blocking mode.
FALSE POSITIVE ATTACKS The number of objects with a blocking protection mode that have an increase in blocked traffic with a low violation rating. Increase in blocked transactions.

Web Exploits: The rate of blocked transactions with a violation rating of 1 or 2 exceeded 0.01% over the past 24 hours.

Investigate blocked transactions and fine-tune your Web Application Security policy to allow valid transactions.
BLOCKED ATTACKS The number of objects with a blocking protection mode that blocked any bad traffic over the past 24 hours. N/A N/A N/A

Modifying a DoS profile to improve application protection

A DoS profile configured on the BIG-IQ Centralized Management system prevents or monitors denial of service (DoS) attacks on web applications. Depending on your configuration, the system detects DoS attacks based on transactions per second (TPS) on the client side, stress-based server latency, heavy URLs, source location, suspicious browsers, and failed CAPTCHA responses. Behavioral DoS (BADoS), a part of stress-based detection, automatically discovers and mitigates DoS attacks using behavioral data.

Changes in your application's traffic might reduce the effectiveness of your existing DoS profile. You can edit DoS profiles that protect your application's security to add or remove attack detection and mitigation measures.

Edit DoS profile for application security

Your virtual server must include an HTTP profile before you can use the DoS profile Application Security feature.
You can configure the conditions under which the system determines that your application is under a DoS attack, and how the system reacts to a suspected attack.
  1. At the top of the screen, click Monitoring.
  2. Click DASHBOARDS > L7 Security .
    This displays all monitored objects.
  3. Click the DoS Profile column header to sort objects by DoS profile.
  4. Click the name of the DoS profile you want to edit.
    The DoS Profile Properties screen opens.
  5. On the left, click Application Security to expand the list.
  6. Click Properties to display the General Settings screen and configure the application security general settings.
    1. In the Application Security setting, select Enabled to use application security protection and display additional properties.
    2. In the IP Address Whitelist setting, specify the IP addresses that the system considers legitimate and does not examine when performing DoS prevention.
      • To add an IP address to the whitelist, type it in the upper field, and click Add. The IP address is added to the whitelist in the lower field.
      • To delete an IP address from the whitelist, select the IP address from the whitelist in the lower field, and click Remove.
      Apply this setting only to BIG-IP devices earlier than version 13.0.
    3. In the Geolocations setting, specify that you want to override the DoS profile's geolocation detection criteria threshold settings by selecting countries from which to allow or block traffic during a DoS attack.
      • To allow traffic from a country, select the country and move it to the Geolocation Whitelist.
      • To block traffic from a country, select the country and move it to the Geolocation Blacklist.
    4. Enable the Trigger iRule setting if you have an iRule that manages DoS events in a customized manner.
    5. Enable the Single Page Application setting if your website is a single page application.
    6. Configure the URL Patterns to use. Each URL pattern defines a set of URLs which are logically the same URL with the varying part of the pattern acting as a parameter, such as /product/*php.
      • To add the URL pattern to the list, type the URL pattern and click Add.
      • To remove the URL pattern from the list, select the pattern from the URL Patterns list, and click Remove.
    7. Enable the Traffic Scrubbing setting if you want traffic scrubbing enabled during attacks by advertising BGP routes. This feature requires configuration of a scrubber profile. Change the Advertisement Duration value if needed.
    8. Enable the RTBH setting if you want to have remotely triggered black hole (RTBH) filtering of attacking BGP IP addresses by advertising the BGP routes. This feature requires configuration of the blacklist publisher. Change the Advertisement Duration value if needed.
    9. Configure whether Performance Acceleration should be used.
      • To forgo performance acceleration, select None.
      • To use performance acceleration, select the TCP fastL4 profile to use as the fast-path for acceleration.
  7. To configure the Proactive Bot Defense settings, click Proactive Bot Defense.
    Property Description
    Operation Mode Specifies the conditions under which the system detects and blocks bots. Select Off, During Attacks, or Always. If Off is selected, no other settings are shown on this tab.
    Block requests from suspicious browsers Strengthens the bot defense by blocking suspicious browsers. By default, the system completely blocks highly suspicious browsers and uses CAPTCHA challenges for moderately suspicious browsers.
    • Select the Block Suspicious Browsers check box to enable or disable blocking of suspicious browsers.
    • Select the CAPTCHA Challenge check box to enable or disable issuing a challenge. Click CAPTCHA Response Settings to select the responses to use.
    Grace Period Specifies time in seconds for the system to validate that browsers are not bots. During this period, the system does not block requests that were not validated. Modify the number or click Reset to Default to reset the value.
    Cross-Domain Requests You can add additional security by allowing only configured domains to reference resources of the site. From the list, select an option. You can also configure domains after selecting one of the Cross-Domain Requests options.
    Related Site Domains Specifies the domains that are part of the web site and protected by Proactive Bot Defense. Add domains by typing a domain in the text box and clicking Add. Remove a domain by selecting it and clicking Remove.
    Related External Domains Specifies the external domains (those not part of your web site) that are allowed to reference resources in your website. Add domains by typing a domain in the field and clicking Add. Remove a domain by selecting it in the text box and clicking Remove.
    URL Whitelist Specifies URLs that are not blocked by Proactive Bot Defense. Requests may still be blocked by the TPS-based / Stress-based attack mitigation. Add URLs to the whitelist by typing a URL in the text box and clicking Add. Remove a URL by selecting it and clicking Remove.
  8. To configure the Bot Signatures settings, click Bot Signatures.
    Property Description
    Bot Signature Check Select Enabled to display settings. You cannot disable the Bot Signature Check property while Proactive Bot Detection, TPS-based Detection with By Device ID selected, or Stress-based Detection with By Device ID selected, is enabled. To disable the Bot Signature Check property, you must first disable the previously listed properties. Alternatively, rather than disabling all bot signature checking by disabling Bot Signature Check, you can disable categories of bot signatures individually.
    Malicious Categories and Benign Categories These two category lists are handled similarly.

    For either category, select None, Report, or Block. That setting is then applied to all the listed items in the category. The categories can also be individually changed to another value. If you change them individually, the value for the Malicious Categories or Benign Categories changes to Custom Configuration. A user cannot set all categories to None and keep Proactive Bot Defense enabled.

    Disabled Bot Signatures Specifies bot signatures that are available and disabled. To specify, move the bot signatures between the Available Signatures list and the Disabled Signatures list.
  9. To configure how mobile applications built with the Anti-Bot Mobile SDK are detected, and to define how requests from mobile application clients are handled, click Mobile Applications.
    Property Description
    Mobile App Protection Specify whether to use mobile application DoS protection.
    • Select Enabled to use configuration of mobile application DoS protection. When this is enabled, requests from mobile applications built with the Anti-Bot Mobile SDK are detected and handled according to the settings.
    • Clear the Enabled check box to have mobile application requests handled without DoS protection.
    iOS Specify the settings for iOS mobile applications.
    • To allow traffic on any iOS package, select Allow Any Package Name. A package name is the unique identifier of the mobile application, such as com.f5.app1.
    • To allow traffic from jailbroken iOS devices, select Allow Jailbroken Devices.
    • To allow traffic on specified packages, type the iOS package names to allow, and click Add. To remove a package from the list, select the package and click Remove. This option is not available if you have chosen Allow Any Package Name. When this is set, all other packages are blocked with the mobile application response page text.
    Android Specify the settings for Android mobile applications.
    • To allow any application publisher, select Allow Any Publisher. A publisher is identified by the certificate used to sign the application.
    • To allow traffic from rooted Android devices, select Allow Rooted Devices.
    • To allow traffic on specified packages, select publisher certificates from the Available publisher certificate list, and move them to the Assigned publisher certificates list. All other certificates are blocked with the mobile application response page text. This option is not available if you have chosen Allow Any Publisher.
    Advanced Specify advanced handling of requests from mobile applications.
    • When a CAPTCHA or client side integrity challenge needs to be presented, select the action to take.
      • To have the traffic passed without incident, select Always passed.
      • To have the traffic challenged for human behavior, select Challenged for human behavior. When this is selected, the SDK checks for human interactions with the screen in the last few seconds. If none are detected, the traffic is blocked.
    • To allow traffic from applications that are run on emulators, select Allow Emulators.
  10. To configure settings for the detection of DoS attacks based on a high volume of incoming traffic, click TPS-based Detection.
    Property Description
    Operation Mode Specifies how the system reacts when it detects an attack, and can be Off, Transparent, or Blocking. If it is set to Off, no other properties are shown.
    Thresholds Mode Specifies how thresholds are configured.
    • To configure each mitigation behavior threshold manually, select Manual.
    • To use the system default mitigation threshold settings, select Automatic.
    Your Thresholds Mode selection affects which threshold options are available in the other sections on this screen.
    By Source IP Specifies the criteria that determine when the system treats the IP address as an attacker, and the mitigation method to be used for the attacking IP address.
    By Device ID Specifies the criteria that determine when the system treats the device ID as an attacker, and the mitigation method to be used for the attacking device.
    By Geolocation Specifies the criteria that determine when the system treats the geolocation as an attacker, and the mitigation method to be used for the attacking geolocation. The settings exclude blacklisted and whitelisted geolocations.
    By URL Specifies the criteria that determine when the system treats the URL as an attacker, and the mitigation method to be used for the attacking URL. Heavy URL Protection can also be enabled, but needs to be configured. Click the Click to configure link next to the option to do so.
    Site Wide Specifies the criteria that determine when the system determines an entire website is under attack, and the mitigation method to be used.
    Prevention Duration Specifies the time spent in each mitigation step before moving (escalating or de-escalating) to the next mitigation step.
  11. To configure settings for the detection of DoS attacks based on server stress, click Behavioral and Stress-based Detection.
    Property Description
    Operation Mode Specifies how the system reacts when it detects a stress-based attack, and can be Off, Transparent, or Blocking. If it is set to Off, no other properties are shown.
    Thresholds Mode Specifies how thresholds are configured.
    • To configure each mitigation behavior threshold manually, select Manual.
    • To use the system default mitigation threshold settings, select Automatic.
    Your Thresholds Mode selection affects which threshold options are available in the other sections on this screen.
    By Source IP Specifies the criteria that determine when the system treats the IP address as an attacker, and the mitigation method to be used for the attacking IP address.
    By Device ID Specifies the criteria that determine when the system treats the device ID as an attacker, and the mitigation method to be used for the attacking device.
    By Geolocation Specifies the criteria that determine when the system treats the geolocation as an attacker, and the mitigation method to be used for the attacking geolocation. The settings exclude blacklisted and whitelisted geolocations.
    By URL Specifies the criteria that determine when the system treats the URL as an attacker, and the mitigation method to be used for the attacking URL. Heavy URL Protection can also be enabled, but needs to be configured. Click the Click to configure link next to the option to do so.
    Site Wide Specifies the criteria that determine when the system determines an entire website is under attack, and the mitigation method to be used.
    Behavioral Detection and Mitigation Specifies the mitigation behavior, and when enabled, the selected level of mitigation to use.
    • For the Bad Actor Detection setting, select Enabled to perform traffic behavior, server capacity learning, and anomaly detection.
    • For the Signature Detection setting, select Enabled to perform signature detection. Select Use approved signatures only to use only approved signatures.
    • For Mitigation, select the type of mitigation to be used. Review the description of each mitigation type to select the best one for your environment,
    Prevention Duration Specifies the time spent in each mitigation step before moving (escalating or de-escalating) to the next mitigation step.
  12. To configure settings for protecting heavy URLs during DoS attacks, click Heavy URL Protection.
    Heavy URLs are those that have the potential to cause stress on the server, even with a low TPS count.
    Property Description
    Automatic Detection Select Enabled to automatically detect heavy URLs of the application, in addition to the URLs entered manually.
    Heavy URLs You can configure a list of heavy URLs to protect, in addition to the automatically detected ones. Type a URL in the top field, and click Add. Optionally, for a BIG-IP device version 13.0 or later, enter a threshold value. To remove a URL from the list, select the URL from the text box, and click Remove
    Ignored URLs You can configure a list of URLs that are excluded from automatic detection as heavy URLs. The system supports wildcards. Type a URL in the top field, and click Add. To remove a URL from the list, select the URL from the text box, and click Remove
    Latency Threshold If Automatic Detection is enabled, set the Latency Threshold setting to be the number of milliseconds for the system to use as the threshold for automatically detecting heavy URLs. The default value is 1000 milliseconds. Click Reset to Default to reset the value to 1000.
  13. To define the responses to use when issuing a challenge, click CAPTCHA Response Settings.
    Note: The exact format of a response body differs, depending on the version of the BIG-IP device. Test and verify that any custom response you create works with your installed BIG-IP version.
    1. For the First Response Type, select Default to use the default response, or select Custom to create your own first response body by entering it into the First Response Body area.
      Here is an example first response body:
      This question is for testing whether you are a human visitor and to prevent automated spam submission.
      <br>
      %DOSL7.captcha.image% %DOSL7.captcha.change%
      <br>
      <b>What code is in the image?</b>
      %DOSL7.captcha.solution%
      <br>
      %DOSL7.captcha.submit%
      <br>
      <br>
      Your support ID is: %DOSL7.captcha.support_id% 
    2. For the Failure Response Type, select Default to use the default response, or select Custom to create your own failure response body by entering it into the Failure Response Body area.
      Here is an example failure response body:
      You have entered an invalid answer for the question. Please, try again.
      <br>
      %DOSL7.captcha.image% %DOSL7.captcha.change%
      <br>
      <b>What code is in the image?</b>
      %DOSL7.captcha.solution%
      <br>
      %DOSL7.captcha.submit%
      <br>
      <br>
      Your support ID is: %DOSL7.captcha.support_id% 
  14. Click Record Traffic to configure settings for the recording of traffic (by performing a TCP dump) when a DoS attack is underway, to diagnose the attack vectors and attackers, observe whether and how it was mitigated, and draw conclusions for changing the DoS profile configuration.
    You can record traffic and collect the TCP dump files into the QuickView file so that F5 Support can use it for solving customer cases. The files have a pcap extension and are located in this path on the BIG-IP device: /shared/dosl7/tcpdumps.
    Property Description
    Record Traffic During Attacks Controls whether traffic recording is used. The default is disabled and causes other properties to be hidden. Note that the system records SSL traffic encrypted. Select Enabled to specify that the system record traffic when a DoS attack is underway, and display settings.
    Maximum TCP Dump Duration Specifies the maximum time, in seconds, for one dump cycle. Legal values are between 1 and 300. The default is 30 seconds.
    Maximum TCP Dump Size Specifies the maximum size, in MB, for a dump cycle. Legal values are between 1 and 50. The default is 10 MB.
    TCP Dump Repetition Specifies whether the system performs one dump, or multiple dumps, for each DoS attack.
  15. Save your work.
The settings are incorporated into the DoS profile.
Next, you can view the attack details for an ongoing DDoS attack to monitor the impact of your edited DoS Profile.

Modifying a Web Application Security policy to improve application protection

Web Application Security imports BIG-IP Application Security Manager (ASM) application security policies from discovered BIG-IP devices, and lists them with the attached protected object (application or virtual server). The Web Application Security policy helps you to define both bad traffic and how this traffic is handled so that it doesn't affect the performance of your application's web server. Changes in traffic or an application's protection needs might reduce the effectiveness of your policy. You can change the policy's configuration to ensure that your protected objects can withstand a Layer 7 attack.

Edit web application security policies

You modify application security policies to customize how they protect your applications and virtual servers. Application security policies can be created in Web Application Security. But more often, they are created on BIG-IP devices and come into the Web Application Security configuration when you discover the devices.
  1. At the top of the screen, click Monitoring.
  2. Click DASHBOARDS > L7 Security .
    This displays all monitored objects.
  3. Click the Web Application Security Policy column header to sort objects by policy.
  4. Click the name of a policy you want to edit.
  5. Edit the properties of the policy as needed.
    Consult the documentation for each policy object to edit it individually. For more information on the policy editing process, refer to the Edit application security policies topic in F5 BIG-IQ Centralized Management: Security in support.f5.com.
  6. Click Save to save the modifications to each object and unlock the policy.
The system saves changes to the policy object in the working configuration of BIG-IQ Centralized Management. If the policy is assigned to a virtual server, the next deployment sends the new configuration to one or more BIG-IP devices.

Modifying a logging profile to monitor application security events

A logging profile configured on BIG-IQ Centralized Management determines the kind of events that the system logs, and where the system stores these events. You can define a logging profile to record events from multiple virtual servers, from multiple devices. Changes to your security settings might require you to adjust the information that is recorded by your existing logging profile. You can edit an existing logging profile to improve your monitoring capabilities.

Edit object logging profiles

Your system must have data collection device (DCD) configured to your BIG-IQ device.
You can edit logging profiles to change the kind of information the system should log, and where you would like to store the logged data.
  1. At the top of the screen, click Monitoring.
  2. Click DASHBOARDS > L7 Security .
    This displays all monitored objects.
  3. Click the Logging Profile column header to sort objects by log profile.
  4. Click the name of a Logging profile you would like to edit
    The logging profile properties screen opens.
  5. Modify the properties as needed.
    Logging profile properties are described in the Create logging profiles section of BIG-IQ Centralized Management: Security on support.f5.com for configuration information.
  6. Save your work.
The settings are incorporated into your log profile. If the profile is assigned to a virtual server, the next deployment sends the new configuration to one or more BIG-IP devices.

Creating a new DoS profile to improve application security

A denial of service attack (DoS attack) makes a resource unavailable to its intended users, or obstructs the communication media between the intended users and the site. A DoS profile allows you to define, monitor, and mitigate traffic patterns that threaten application security.

First, you create a new DoS profile that defines general properties of DoS protection. Once the profile is created, you can configure your profile to detect DoS attacks specific to application security. Application security can define DoS attacks based on either:
  • A high volume of incoming traffic (using TPS-based Detection settings)
  • Server stress (with Behavioral and Stress-based Detection settings)
You can assign your new DoS profile to one, or several applications and virtual servers that require DoS attack protection.

Create a DoS profile with application security

Before you can create a DoS profile, your virtual server must include an HTTP profile to use the application security feature.
You create a new DoS profile for your objects if you have not yet configured DoS protection, or if the current DoS profiles in the system do not meet the needs of your application or stand-alone virtual server.
  1. At the top of the screen, click Monitoring.
  2. Click DASHBOARDS > L7 Security .
    This displays all monitored objects.
  3. Click Create and select DoS Profile.
  4. In the New DoS Profile screen, add and set the properties as appropriate.
  5. Specify a unique Name for the DoS profile.
  6. Specify an optional Description for the DoS profile.
  7. Specify the Partition to which the DoS profile belongs.
    You can replace the default Common partition when creating DoS profiles by typing a unique name for a new partition.
    The partition with that name must already exist on the BIG-IP device. No whitespace is allowed in the partition name.
  8. If you want to make this policy available to application templates, for Application Templates select the Make available in Application Templates check box.
  9. Specify the Threshold Sensitivity for the DoS profile.
    Thresholds for detecting attacks are higher when sensitivity is Low , and lower when sensitivity is High.
    This property is not used with the Application Security protection type.
  10. In the Source IP Address Whitelist setting, specify the configuration of the Source IP address white list.
    This property is not used with the Application Security protection type.
  11. In the HTTP Whitelist setting, specify the HTTP whitelist to use.
    This setting is applied only to BIG-IP devices version 13.0, or later.
  12. At the left, click Application Security > Properties , then select the Application Security Enabledcheck box, .
    When enabled, this protects your web application against DoS attacks. Supply or modify any necessary values in the Properties settings. For information on the configuration process, refer to the Configure for application security topic in F5 BIG-IQ Centralized Management: Security on support.f5.com.
  13. To configure settings for the detection of DoS attacks based on a high volume of incoming traffic, click TPS-based Detection.
    Property Description
    Operation Mode Specifies how the system reacts when it detects an attack, and can be Off, Transparent, or Blocking. If set to Off, no other properties are shown.
    Thresholds Mode Specifies how thresholds are configured.
    • To configure each mitigation behavior threshold manually, select Manual.
    • To use the system default mitigation threshold settings, select Automatic.
    Your Thresholds Mode selection affects which threshold options are available in the other sections on this screen.
    By Source IP Specifies the criteria that determine when the system treats the IP address as an attacker, and the mitigation method to be used for the attacking IP address.
    By Device ID Specifies the criteria that determine when the system treats the device ID as an attacker, and the mitigation method to be used for the attacking device.
    By Geolocation Specifies the criteria that determine when the system treats the geolocation as an attacker, and the mitigation method to be used for the attacking geolocation. The settings exclude blacklisted and whitelisted geolocations.
    By URL Specifies the criteria that determine when the system treats the URL as an attacker, and the mitigation method to be used for the attacking URL. Heavy URL Protection can also be enabled, but needs to be configured. Click the Click to configure link next to the option to do so.
    Site Wide Specifies the criteria that determine when the system determines an entire website is under attack, and the mitigation method to be used.
    Prevention Duration Specifies the time spent in each mitigation step before moving (escalating or de-escalating) to the next mitigation step.
  14. To configure settings for the detection of DoS attacks based on server stress, click Behavioral and Stress-based Detection.
    Property Description
    Operation Mode Specifies how the system reacts when it detects a stress-based attack, and can be Off, Transparent or Blocking. If set to Off, no other properties are shown.
    Thresholds Mode Specifies how thresholds are configured.
    • To configure each mitigation behavior threshold manually, select Manual.
    • To use the system default mitigation threshold settings, select Automatic.
    Your Thresholds Mode selection affects which threshold options are available in the other sections on this screen.
    By Source IP Specifies the criteria that determine when the system treats the IP address as an attacker, and the mitigation method to be used for the attacking IP address.
    By Device ID Specifies the criteria that determine when the system treats the device ID as an attacker, and the mitigation method to be used for the attacking device.
    By Geolocation Specifies the criteria that determine when the system treats the geolocation as an attacker, and the mitigation method to be used for the attacking geolocation. The settings exclude blacklisted and whitelisted geolocations.
    By URL Specifies the criteria that determine when the system treats the URL as an attacker, and the mitigation method to be used for the attacking URL. Heavy URL Protection can also be enabled, but needs to be configured. Click the Click to configure link next to the option to do so.
    Site Wide Specifies the criteria that determine when the system determines an entire website is under attack, and the mitigation method to be used.
    Behavioral Detection and Mitigation Specifies the mitigation behavior, and when enabled, the selected level of mitigation to use.
    • For the Bad actors behavior detection setting, select Enabled to perform traffic behavior, server capacity learning, and anomaly detection.
    • For the Request signatures detection setting, select Enabled to perform signature detection. Select Use approved signatures only to use only approved signatures.
    • For the Mitigation setting, select the type of mitigation to be used. Review the description of each mitigation type to select the best one for your environment,
    Prevention Duration Specifies the time spent in each mitigation step before moving (escalating or de-escalating) to the next mitigation step.
  15. When you are finished, save your work.
The new DoS profile is added to the list of profiles.

Creating a new Web Application Security policy to improve application protection

A Web Application Security policy implements various levels of security to protect Layer 7 applications. The L7 Summary Dashboard ( Monitoring > DASHBOARDS > L7 Security ) lists the applications and virtual servers attached to BIG-IP Application Security Manager (ASM) policies. With this dashboard, you can create new policies based on the requirements of the objects configured to your monitored BIG-IP systems.

You create a new application security policy based on observed traffic patterns. In addition, you have the flexibility to manually develop a security policy that is customized for your needs, based on the amount of protection and acceptable risk. For more information, refer to the Managing Application Security Policies in Web Application Security topics in BIG-IQ Centralized Management: Security on support.f5.com.

Create a Web Application Security policy

Your virtual server must include an HTTP profile (not transparent) before you can configure a new policy.
You can use BIG-IQ Web Application Security to add new application security policies for later deployment over monitored applications and virtual servers.
  1. At the top of the screen, click Monitoring.
  2. Click DASHBOARDS > L7 Security .
    This displays all monitored objects.
  3. Click Create and select Policy.
  4. Specify the following information about the new Web Application Security policy:
    1. Type the Name (required) of the security policy.
    2. Specify the Partition (required) to which the security policy belongs.
      Only users with access to a partition can view the objects that it contains. If the security policy resides in the Common partition, all users can access it.
    3. For Application Language, select the language encoding (required) for the web application, which determines how the security policy processes the character sets.
      The default language encoding determines the default character sets for URLs, parameter names, and parameter values.
    4. For Enforcement Mode, specify whether blocking is active or inactive for the security policy.
      You can enable or disable blocking for individual violations in the subsequent tables of settings and properties. If transparent appears, blocking is disabled for the security policy. This disables blocking for all options, and the check boxes to enable blocking are unavailable.
  5. When you are finished editing General Properties, click Save.
    This makes the remaining policy objects available for editing.
  6. Click the options in the list to the left to configure addition properties to your policy.
  7. Click Save to save the modifications to each policy property.
  8. Click Save & Close when you are finished editing.
The newly-created policy is added to the list of application security policies, and the new policy object exists in the working configuration of the BIG-IQ system. At this point, you can add it to any object in Web Application Security.

Creating logging profile for event monitoring

A logging profile records requests to a virtual server. You can determine which requests to log, and where to store the request information. The L7 Summary Dashboard ( Monitoring > DASHBOARDS > L7 Security ) lists the applications and virtual servers attached to a log profile. Use this dashboard to create new log profiles based on the requirements of the objects listed on the screen.

For more information, refer to the Managing Logging Profiles in Shared Security topics in BIG-IQ Centralized Management: Security on support.f5.com.

Create a logging profile for application security

You create logging profiles to specify the kind of information to log for objects that support logging.
  1. At the top of the screen, click Monitoring.
  2. Click DASHBOARDS > L7 Security .
    This displays all monitored objects.
  3. Click Create and select Log Profile.
    The New Logging Profile screen opens with the Properties displayed.
  4. Type a Name for the logging profile.
  5. Type an optional Description for the logging profile.
  6. If needed, change the default Common partition in the Partition field.
    The partition with that name must already exist on the BIG-IP device. No whitespace is allowed in the partition name. Only users with access to a partition can view the objects (such as the logging profile) that it contains. If the logging profile resides in the Common partition, all users can access it.
  7. For Application Templates, specify whether the profile is available to application templates.
    • To make the profile available to application templates, select the Make available check box.
    • To keep the profile from being available to application templates, clear the check box.
  8. On the left, click the logging type that you want to use, and then select the Enabled check box to display the related settings.
    • Enable APPLICATION SECURITY to specify that the system logs traffic to the web application. You cannot enable both APPLICATION SECURITY and PROTOCOL SECURITY. Refer to the Configure for Application Security logging section of BIG-IQ Centralized Management: Security on support.f5.com for configuration information.
    • Enable PROTOCOL SECURITY to specify that the system logs any dropped, malformed, and/or rejected requests sent through the given protocol. Refer to the Configure for Protocol Security logging section of BIG-IQ Centralized Management: Security on support.f5.com for configuration information.
    • Enable NETWORK FIREWALL to specify that the system logs ACL rule matches, TCP events, and/or TCP/IP errors sent to the network firewall. Refer to the Configure for Network Firewall logging section of BIG-IQ Centralized Management: Security on support.f5.com for configuration information.
    • Enable NETWORK ADDRESS TRANSLATION to specify which Network Address Translation (NAT) events the system logs, and where those events are logged. Refer to the Configure for Network Address Translation logging section of BIG-IQ Centralized Management: Security on support.f5.com for configuration information.
    • Enable DOS PROTECTION to specify that the system logs detected DoS attacks, and where DoS events are logged.
    • Enable BOT DEFENSE to specify that the system logs bot defense events. Refer to the Configure for Bot Defense logging section of BIG-IQ Centralized Management: Security on support.f5.com for configuration information.
    You must configure each enabled logging type before you can use it. You can do that now, or save the profile and configure the logging types later.
  9. Specify the settings needed for each logging type you use.
    You can configure multiple logging types while editing the logging profile.
  10. When finished, save your changes.
The newly created log profile is added to your list of log profiles.