Manual Chapter :
Platform Maintenance
Applies To:
Show Versions
About maintaining the platform
The i800 Series platform contains components that you can replace individually without exchanging the entire system. This platform contains these replaceable components:
- AC power supply
About power supplies
This platform supports up to two AC hot swappable power supplies. Most platforms come with only one power supply by default.
CAUTION:
Running without
power supplies installed in all available bays in the platform can affect
cooling and electromagnetic interference (EMI). If you need to run the unit
with one power supply unit (PSU), you must install a blank supply bracket into
the empty power supply bay. The blank supply bracket is required to maintain
proper airflow in the system. If you do not have a blank supply bracket, leave
all supplies installed and disconnect power from any unused PSUs.
CAUTION:
Do not mix power
supply unit (PSU) models. If two PSUs are installed in the same system, use
only PSUs of the same model.
Important: This product
is sensitive to electrostatic discharge (ESD). F5®
recommends that you use proper ESD grounding procedures and equipment when you
install or maintain the unit.
Note: The AC
power supply units (PSU) do not
have an on/off switch. You can control the power from the rack switch
.
Note: After removing input
power from any power supply unit, wait 30 seconds before reapplying input
power to the power supply unit.
About AC power supplies
This platform can support up to two AC power supplies. You can hot swap a power supply without powering down the system if there are two installed, and one remains installed and operational during the replacement process.
The platform supports power supply redundancy, which ensures that the system is unaffected if a single power supply fails in a system containing more than one power supply.
CAUTION:
As a safety
precaution, the socket outlet must be installed near the equipment and be
easily accessible.
Replace an AC power supply in a single-supply system
In the event of a power supply
failure, you can replace an AC power supply in a single supply system.
CAUTION:
Be
sure that you are using the correct wattage power supply when performing a
power supply replacement.
Note: All photos shown
are examples. The appearance of your components or accessories might vary
slightly.
-
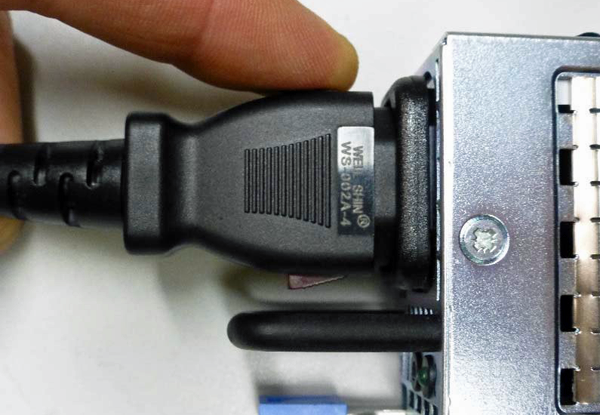
Before removing the PSU from your system, disconnect the AC power
cord from the power supply by pulling one or both of the power cord
locking tabs away from the power supply.
Important: Locking AC power cords might not be available in all countries.
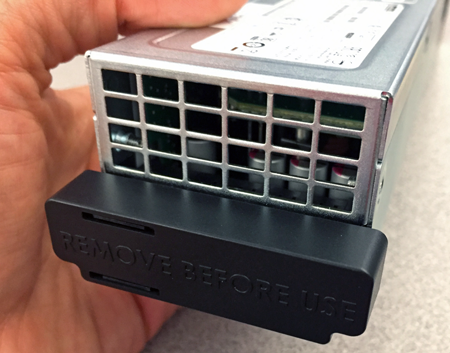
-
If a connector protective cap is installed on your new PSU, remove it
prior to installing the PSU into your system.
Replace an AC power supply in a dual-supply system
In the event of a power supply
unit (PSU) failure, you can replace an AC PSU in a dual-supply system without
powering down the system, provided that there is at least one PSU operating
during the replacement process.
CAUTION:
Be
sure that you are using the correct wattage power supply when performing a
power supply replacement.
Note: All photos shown
are examples. The appearance of your components or accessories might vary
slightly.
-
Before removing the PSU from your system, disconnect the AC power
cord from the power supply by pulling one or both of the power cord
locking tabs away from the power supply.
Important: Locking AC power cords might not be available in all countries.
-
If a connector protective cap is installed on your new PSU, remove it
prior to installing the PSU into your system.


