Updated Date: 07/07/2026
Configuring Azure Conditional Access
To configure BIG-IP client certificate inspection:
-
Sign in to the Azure portal.
-
In Azure active directory, click Conditional access > VPN connectivity.
-
Create a new certificate with:
- Validity: One year
- Primary: Yes
-
Import the certificate onto the BIG-IP system.
-
Navigate to System > Certificate Management > Traffic Certificate Management > SSL Certificate List. Click Import to import certificate.
-
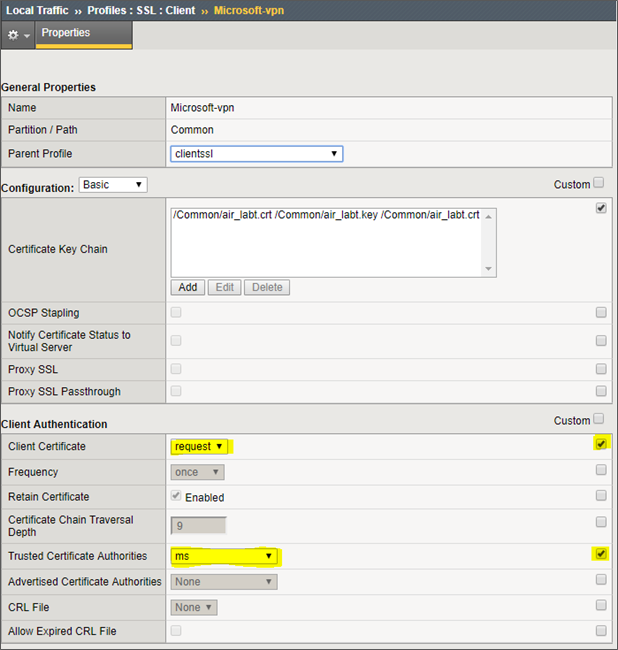
Navigate to BIG-IP System manager > Local traffic > Profiles > SSL > Client.
-
Choose the certificate for Trusted Certificate Authorities, and enable request for Client Certificate.
-
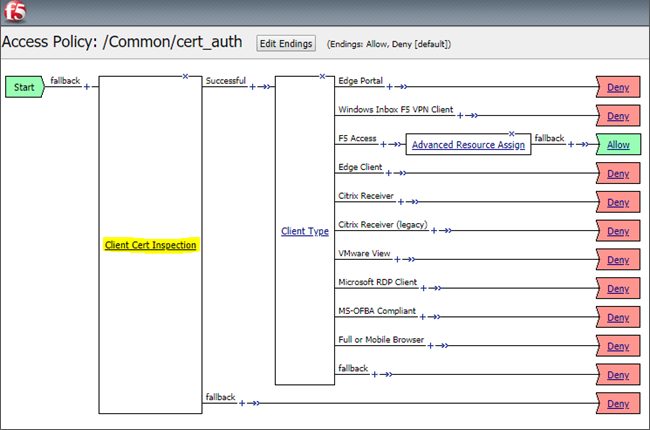
Add Client Certificate Inspection to your current VPN APM Access Policy.
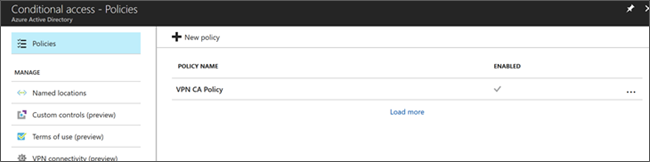
To configure your conditional access policy:
-
Sign in to the Azure portal.
-
In Azure active directory, in the Manage section, click Conditional access > Add.
-
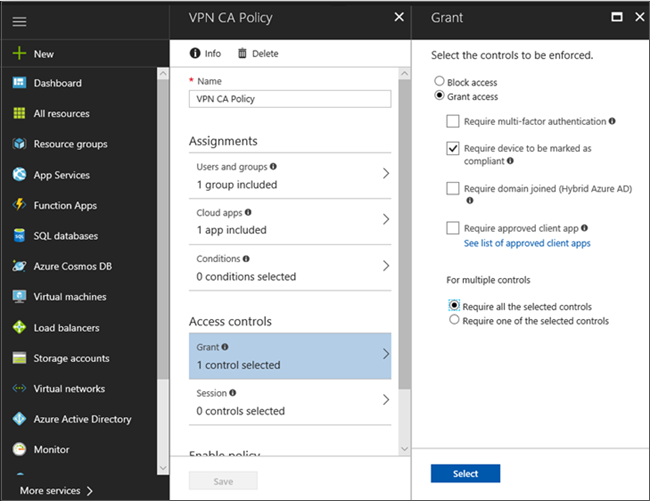
In the example here, we want make sure that all VPN connections from “VPN Users” group are controlled. Create a new policy with the following selections:
- Name: Type
VPN CA Policy - Users and Groups: VPN Users
- Cloud Apps: VPN Server
- Conditions: No conditions
- Grant: Select Grant access and then select Require device to be marked as compliant. You can also use Require multi-factor authentication or Require domain joined (Hybrid Azure AD) options.
- Session: No session
- Name: Type
-
Enable the new policy in Azure active directory > Conditional access.
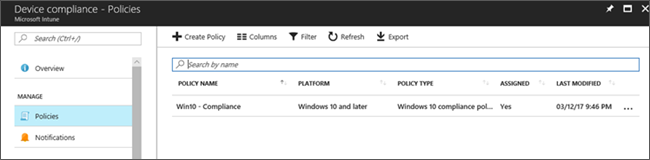
You can deploy compliance policy to users in user groups or devices in device groups. When a compliance policy is deployed to a user, all of the user’s devices are checked for compliance. If a device doesn’t have a compliance policy assigned, then this device is considered not compliant. To become a managed device, a device must be a device that has been marked as compliant. To mark the device as compliant in Azure AD:
-
Sign in to the Azure portal.
-
Click Device compliance > Policies > Create Policy.
-
Create a new compliance policy without configuring any settings.
-
Assign this policy to VPN users group.
To add a conditional access to VPN profile using Intune:
-
Sign in to the Azure portal.
-
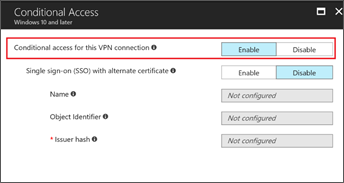
Create a new VPN profile for Windows 10. Follow the steps similar to creating a base VPN profile. Enable the Enable conditional access for this VPN connection to ensure that devices that connect to the VPN are tested for conditional access compliance before connecting.
F5 Access for Windows Desktop supports the following three authentication flows:
- Username
- Certificate only (no prompt for credentials)
- Username & certificate
These authentication flows can be configured through custom XML commands. You can enter Custom XML commands that configure the VPN connection in F5 Access profile using Intune.
The following example shows how a certificate is configured using custom XML.
<f5-vpn-conf>
<prompt-for-credentials>false</prompt-for-credentials>
<client-certificate>
<issuer>Microsoft VPN root CA gen 1</issuer>
</client-certificate>
</f5-vpn-conf>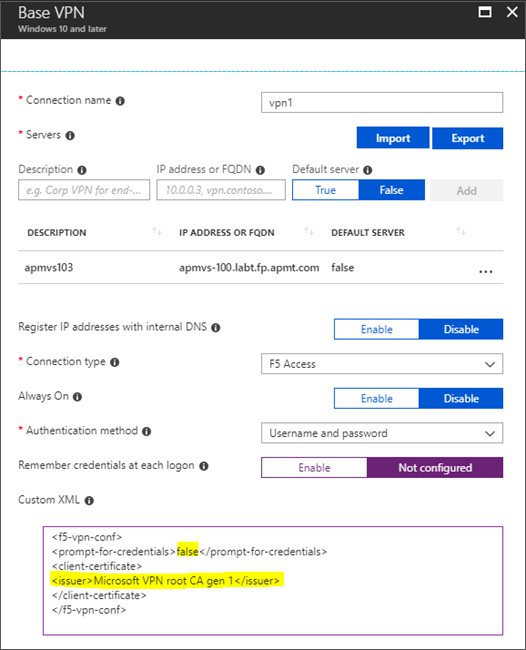
Refer to Configuration Notes: F5 Access for Microsoft Windows 10 and Windows 10 Mobile for more information.
To access pre-defined certificates:
-
Follow the below steps to connect to VPN:
-
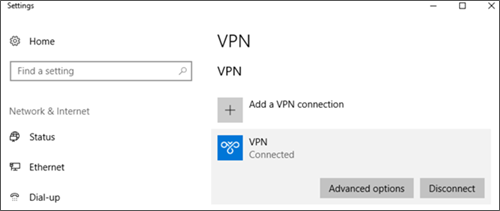
On the Windows 10 device, navigate to Settings > Sync.
-
Wait for the new VPN to be installed. Connect to VPN.
-
-
On successful VPN connection, run the
Certmgr.msccommand in cmd prompt or PowerShell window.This will launch the Current User certificate MSC.
-
Navigate to Certificates - Current User > Personal > Certificates. You should see a newly provisioned certificate issued by “Microsoft VPN root CA gen 1”.
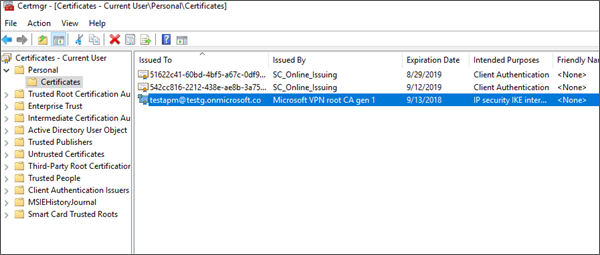
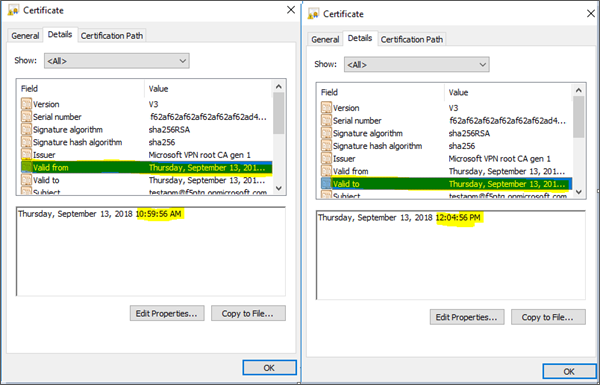
Certificate’s expiry date will be 60 minutes from when it was last requested.